And the winner is …

Art, Birds, Carving, Free Giveaway, nature, Printing, Printing blocks, Rubber stamps, Uncategorized

Congratulations British Chick Across the Pond; your name was selected by the random name selector to win a limited edition print. Sophie, aka British
Chick is not only a WordPress blogger, but entered my competition giveaway on Facebook.
Thanks to everyone who entered. 🙂 it was exciting as I had no idea who’d win!
Meanwhile, here is another of my handcut printing blocks: an everyday, easily accessible eraser carved ready for my Christmas gift tags and a silk tie I printed using it last night 🙂

20141213-205847-75527873.jpg

20141213-205857-75537835.jpg

20141213-205913-75553453.jpg

Birds on Gelliprint

Art, Birds, gelliplate, leaves, Mono printing, nature, nature, Printing, Textures, watercolour

Another bird Gelli to add to the collection with textures produced from leaves, scrunched up paper and layering of watercolours

20141019-231704-83824498.jpg
The difference with this bird study and the others is that this time, I didn’t mask out the bird shapes first, but became inspired by the shapes I saw in the print when I pulled it off the plate.
You can see from this image (of a cat brooch I made and set against the background print) that there appears to be a bird shape appearing.

20141019-232058-84058620.jpg
Similarly, where the hummingbird is, there was also an outline (but I didn’t have a photo of that stage to show!).

Cockatiel

Art, Birds, commission, flowers, gelliplate, leaves, life, monoprinting, Printing, watercolour

image

Today’s gelliprint was worked in subdued lighting and with a limited palette of colours as I await the delivery of new paints – Golden Open Acrylics – should be here tomorrow.

The evenings are getting darker at around 7:15pm.  Working in synthetic light can have its surprises when you step outside into the natural light – the colours can appear very different to what you envisaged!

Again, I sketched out a bird and cut three masks from the sketch to block out any paint on the gelli.  There’s a bit more to do on the final print, but the chrysanthemums and their leaves were quite pleasing for a first pull off the plate.  I’ll add a bit more colour when it’s daylight and may even print more chrysanthemums on the background. 🙂

A gelliprinted magpie

Birds, Mono printing, nature, nature, Printing, Textures

20140928-201912-73152191.jpg

Currently working on a series of prints for a book. Here is one of them – a magpie which I first quickly sketched in charcoal

20140928-202017-73217135.jpg

Then I draw a simpler shape of the magpie to mask out the paint from the gelli, ready for me to draw in the detail as shown above.

DIY rubber stamp

Birds, Mono printing, nature, Photography, Printing, Textures, Uncategorized

Ok, so you want to make a rubber stamp, maybe for a logo or a letter head that you can use over and over again…where do you start?

1- buy a large rubber or look in your own stationery drawer
I bought this one in a superstore where I usually get my groceries

20140818-214517-78317471.jpg

2 – decide on a simple image such as this seagull I drew from a photograph I took yesterday in Dartmouth. Sketch it out on the surface with a permanent pen (you may need to draw it in pencil first … I didn’t – see below why this may be a good idea!)

20140818-214636-78396838.jpg

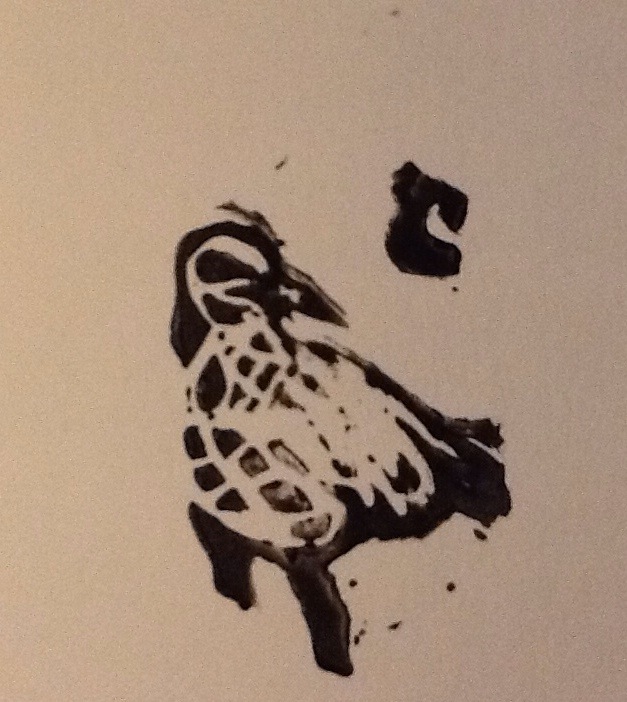
3 – once you are happy with the design you can then go over the outlines in pen. Remember everything you cut away will not get any ink on it so if you want texture leave areas uncut.

20140818-214944-78584238.jpg

As you can see from the above, I’ve added the initial ‘J’. If you do decide to put any lettering on your stamp make sure you do it in reverse or it will print backwards like mine did! Ha ha ha! Ooops!

20140818-215212-78732997.jpg

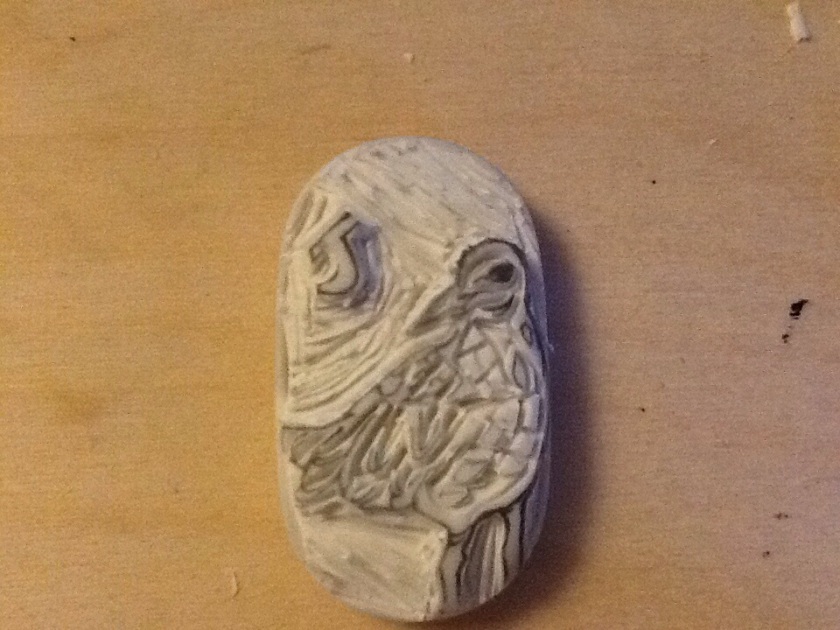
4 – you may or may not need to cut more away from the rubber, depending on how the initial print comes out. Also, depending on the shape and style of the eraser, you may have to ‘roll’ the rubber while still retaining its print position on the paper. My eraser is rounded at the edges, so to make sure my gull image came out fully, I had to roll it from side to side while applying pressure.

20140818-215505-78905481.jpg

5 – finally add any special touches to your print. This one was the rubber stamp applied to a gelliplate monoprint of leaves. I also added pieces cut from another monoprint where I used a small pepper and some shells pressed into the ink. Finally, I applied a little white on the bird to bring out the features (note the difference between this bird against a blue/green leaf background and the gull on a pale background, where I didn’t apply any white)

20140818-220423-79463169.jpg

20140818-235213-85933851.jpg